Pages

Tuesday, November 29, 2011

Bolognese Fake Out

The other night I was flipping through my mountains of cookbooks, searching for inspiration, when I saw a recipe from Barefoot Contessa for a "weeknight bolognese" dinner.  In fact, I had been trying to get a good angle on some new uses for canned tomatoes (more on this later!), so this recipe just called out to me.  I love cooking with canned tomatoes because they are so flavorful and easy to cook with.  And as an avid runner, I am always in the market for a new pasta dish!  This recipe is one step up from an earlier tomato sauce post, but it's just as simple and delicious.

Originally, I had intended to just omit the beef that the recipe called for, because it seemed easy enough.  But when I opened my freezer, I saw some "crumbles" that I had purchased a few months ago from Quorn.  According to my friend, and confirmed by the website, the principle ingredient of Quorn isn't soy, it's actually a form of fungi that is high in protein and low in fat.  Sounds odd, but I threw in some of those crumbles to my cooked sauce and I had a thicker, richer, and healthier sauce.  Triple bonus!  Of course, you can omit the Quorn completely and you'll have a delicious pasta sauce, or you can cook it with beef according to the original recipe.  But I happened to love my bolognese fake out, and I think you will too! 


Pasta Bolognese Fake Out (Vegetarian Bolognese)
adapted from Barefoot Contessa
serves 4-6

Ingredients
2 tbls olive oil
4 cloves garlic, minced
1 tbls dried oregano
1/4 tsp red pepper flakes (more if you like more heat)
1 28-oz can crushed tomatoes
1/2 cup vegetable stock
1 cup Quorn frozen "beef" crumbles
1 box of short pasta (small shells or orecchiette work well)
1/4 cup cream
Dash of nutmeg
Salt & pepper
Parmesan cheese

Directions
Heat a large skillet over medium heat and add in the olive oil.  Allow the oil to heat up a bit, then add in the garlic, oregano, and red pepper flakes.  Saute until the garlic is fragrant, then add the crushed tomatoes and vegetable stock.  Season with salt and pepper.  Allow the sauce to come up to a boil, then reduce the heat and let simmer for about 10 minutes, stirring occasionally.

In the meantime, bring a large pot of water up to a boil.  Salt the water liberally, then cook the pasta according to the packaged directions.

Add the Quorn to the sauce and stir to heat up the crumbles.  After a few minutes, stir in the cream and nutmeg, and taste for seasonings.  Add more salt and pepper if needed. 

When your pasta is finished cooking, drain and add to the pan of sauce.  Stir to coat. 

Serve up the pasta, and top each plate with some grated Parmesan cheese and basil if you have any on hand.  Enjoy this classic pasta fake out!

Sunday, November 27, 2011

Second Day of Appetizers: Gougeres

It's the "Second Day of Appetizers" this holiday season on Ruminations on Food, and I bring you a great recipe that I ripped (literally) from the Star Tribune taste section.  Gougeres are bite-sized, airy cheese puffs that make a great appetizer for any gathering or meal.  The recipe is pretty simple and my favorite part about gougeres is that you can make them ahead of time and pop them in the oven for five minutes before serving.  Easy.  And cheesy.  The puffs hollow out as they bake, so this is also a light snack that won't fill up your stomach before the big meal.  I brought mine to my family's Thanksgiving dinner up in Osakis.  The pumpkin pie I made was a disaster, so I was glad I had these little guys to fall back on!


Gougeres
adapted from the Star Tribune
makes about 36 puffs

Ingredients
8 tablespoons (one stick) unsalted butter
1 cup water
1/2 tsp salt
1 cup flour
4 eggs, beaten
1 1/4 cup Gruyere cheese, grated
2 tsp. Dijon mustard
1/2 tsp pepper

Directions
Preheat the oven to 400 degrees and line two baking sheets with parchment paper.* 

In a medium sauce pan, heat the butter, water, and salt over medium heat.  Once the butter has melted and the mixture begins to boil, remove from heat and add the cup of flour all at once to the liquid.  Begin stirring immeidately with a wooden spoon until the mixture comes together into a ball of dough.  Return the pan to medium heat and continue stirring for another minute, until a light film begins to coat the bottom of the pan. 

Scrape the dough into a larger bowl and beat with a mixer for about a minute to cool it off.  Reserve about a tablespoon of the beaten egg for later, and add in the rest of the egg mixture to the dough in four parts, beating after each addition until the egg has completely incorporated. 

Add in one cup of the cheese, the mustard, and pepper, and stir until well blended.  Then you may either use a tablespoon to measure out the dough, or put the dough into a large plastic bag and snip one of the corners off.  Then use the bag like a pastry bag and squeeze out little bits of dough onto the pan. 


Using a pastry brush, dot each dough mound with a bit of the reserved egg mixture.  Bake for 20 minutes, then reduce the heat to 350 and bake another 10 minutes, until golden brown.


Remove from the oven and sprinkle the reserved cheese on top of the puffs.  Put back into the oven for a minute to set the cheese.  Then let cool for a bit, but serve warm.  If you are baking in advance, let cool completely and store in the fridge overnight or in the freezer for up to a month.  Reheat at 350 degrees for about five minutes. 

Serve and enjoy!

*I ran out of parchment paper and tried just greasing the pans with cooking spray.  It made it hard to form the dough into little puffs because it kept sliding around.  Go with the parchment paper!

Wednesday, November 23, 2011

Friends on Food :: Happy Thanksgiving!

Happy Thanksgiving!  To celebrate this holiday of thanks and gratitude, I thought I would post a Thanksgiving-themed Friends on Food.  There are so many great Thanksgiving episodes to choose from, but I opted for the one with a cameo by Brad Pitt.  He's just as delicious as Thanksgiving dinner :)  Have a wonderful holiday everybody!

Season 8 - The One with the Rumor

Will: Look at her standing there with those yams.  My two greatest enemies Ross: Rachel Green and complex carbohydrates!

Monday, November 21, 2011

Pumpkin Puree & Salty Pumpkin Seeds

We just had our first Minnesota snowfall of the season and upon seeing that first bit of snow, I immediately starting longing for sweatpants, flannel, hot cocoa, and Christmas music.  I adore winter, even these Minnesota winters!  And if you know me but at all, you know that my fondness for winter comes with a dislike of summer.  It's true!  Give me December over July any day.  So this Saturday night, I finally decided to tackle the three sugar pumpkins I bought a few weeks ago at the St. Paul Farmers' Market.  It seemed fitting for the snowy occasion! 

It's so incredibly easy to break down a pumpkin into fresh puree and, bonus, you get to roast the seeds into salty deliciousness!  Fresh pumpkin can really make a difference in your pumpkin recipes, so buy a sugar pumpkin at your local farmers' market or co-op and try out these recipes.  (Note: don't use a regular Halloween pumpkin for baking -- make sure you buy a sugar pumpkin.  They are a little smaller than your typical carving pumpkin.) 


I'll be cooking with the pumpkin puree all winter long, and so can you!

Baked and Pureed Sugar Pumpkin
Depending on the size of the pumpkin, you can get 2-5 cups of pureed pumpkin.

Preheat your oven to 450 degrees.  Carve out the stem of the pumpkin using a pairing knife.  Cut off the seeds from the top and put them into a large bowl. 

Then, chop the entire pumpkin in half using a large, sharp knife.  Next, using a large spoon, scrape the stringy parts and seeds out of the pumpkin, and put all of that into your bowl.  Getting out all of the insides might require some muscle...really scrape it out! 


Once you have a cleaned pumpkin, place the halves as best you can into a baking dish, cut side down.  Fill the baking dish with about 1/2 inch of water.  Bake the pumpkin until the skin is easily pierced with a fork. 

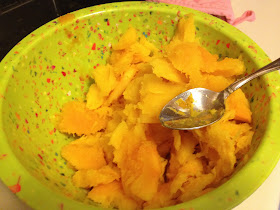
Once the skin is browned and the pumpkin is tender, remove the pan from the oven and let the pumpkin cool, still cut-side down, until you can handle it easily.  Then, scrape the pumpkin off of the skin using a spoon.  It should come right off without any problems. 


Once you've collected all of the pumpkin flesh, puree it in batches in a food processor or blender.  I measure out two cups of pureed pumpkin and put them into freezer bags.  Stash them in the freezer until you're ready to cook! 

Salty Pumpkin Seeds

While the pumpkin is cooking, start on the seeds.  Using your fingers, separate the seeds from the stringy bits and throw those bits away, keeping the seeds in the bowl.  Once you've gotten most of the insides separated, rinse the seeds and try to remove the rogue bits of pumpkin. 


Put the seeds back into the bowl and add a drizzle of extra virgin olive oil.  Then add whatever salty flavors you want.  You could try Lawry's seasoning salt, a bit of cayenne pepper, or go sweet and add cinnamon and sugar. 

Roast the seeds at 350 degrees for about 20 minutes, turning them about half way through the cooking.  I roast mine a little longer because I like them super browned. 

Let the seeds cool before putting them in an airtight container.  Try not to eat them all at once!! 

Friday, November 18, 2011

Twelve Days of Appetizers :: Roasted Red Pepper Tapenade

Ah the holidays.  Such a wonderful time filled with friends, family, joy, and the inevitable panic and stress associated with hosting a holiday gathering.  As a vegetarian, I gravitate now toward the appetizer table and fill in the gaps with some slices of pie.  Yum.  And even outside of a holiday party, I often will choose an appetizer to be my main course at a restaurant, or I'll have "app night" and make all snacky foods for dinner.  YUM.  But surprisingly, the recipe page of my blog is lacking in available appetizers.  And for those of you gearing up for the holidays, that just won't do!  So I present to you: The Twelve Days of Appetizers!  I will try my hardest to post twelve stellar appetizer recipes so that you can have a large variety to choose from come your holiday party. 

A quick disclaimer: some of these I will have made in the past and therefore I won't have any pictures of the final dish to share.  But I'll throw in some other pictures, just for added intrigue!  And the First Day of Appetizers is one such recipe.  Instead of a partridge in a pear tree, feast your palates on this delicious roasted red pepper tapenade!  It's easy to make and calls for a lot of things that you might have standard in your pantry.  I call on this recipe whenever I need a quick dip to share, and it's red so it's perfect for the holidays!

Roasted Red Pepper Tapenade
serves a party of about 8-10 as an appetizer

Ingredients
1-16oz jar roasted red peppers, drained & chopped
1-6oz jar marinated artichokes, drained & chopped (if marinated in oil, reserve the oil)
1 cup minced cilantro
1/2 cup grated Parmesan cheese
1/3 cup olive oil (or the olive oil from the marinated artichokes)
1/3 cup capers, drained
4 cloves chopped garlic
1 tbls fresh lemon juice
Salt & pepper to taste

Directions
Throw all of the ingredients into a food processor, process until slightly smooth.  Taste and adjust the seasonings.  Spoon into a bowl and serve with toasted baguette slices or flatbread!

See -- told you it was easy!

Tuesday, November 15, 2011

Sweet & Sour Tofu

Tofu can be a bit of a mystery for some people, myself included.  But I started eating tofu in stir fry and other noodle dishes even before I went all veggie.  Tofu really sucks up the flavor of whatever you are serving, and if you fry it up, the crispy outsides may even be a welcome change of pace from a traditional meat dish.  I don't cook with tofu all that often, only because I haven't taken the time to really figure out great ways to serve it.  But this recipe gets gold stars on many accounts: it's easy to make, the ingreidents are probably already in your kitchen, and it is delicious.  I make mine extra saucy and serve it up over a bed of rice, or in this case, quinoa.  If you try it, I really think it could change your mind about the benefits of tofu!  Yum.


 Sweet & Sour Tofu
serves 2 portions
adapted from Big Girls Small Kitchen

Ingredients
1 block of firm tofu
2 tablespoons whole wheat flour
1/2 cup of soy sauce
1/2 cup of honey or brown sugar
1/2 cup white wine vinegar or lemon juice
1 tablespoon grated ginger
1 tablespoon grated garlic
extra virgin olive oil

Directions
Remove the tofu from the packaging and cut it into 1-inch slices.  Place paper towels underneath and on top of the sliced tofu and press down to extract the liquid.  Repeat if necessary until the tofu is quite dry.  Then slice the tofu into 1-inch cubes.  Toss the cubes in a plastic bag filled with the flour until evenly coated.

In a small bowl, combine the soy sauce, honey, white wine vinegar, ginger and garlic.  Set aside.

In a large skillet, coat the bottom of the pan with a drizzle of olive oil.  Once warm, place the tofu in the pan in an even layer.  (Do this in batches if you have a small skillet.)  When that side is golden brown, flip the tofu around to brown all of the sides.  When the tofu is browned, add the sauce to the pan, shaking the pan to completely coat the tofu.  Keep the pan on the heat until the tofu is coated and the sauce has reduced and thickened.  Serve over rice and enjoy!

Wednesday, November 9, 2011

"Hobo" Roasted Vegetables

Disclaimer: growing up I had NO idea that my parents called this dish "hobo vegetables."  It was only when I called for some specifics about the recipe that I realized that was the name!  But the unfortunate-sounding name is not indicative of how tasty this veggie side can be.  It was always a treat when I realized that my mom was roasting up her classic carrot/potato/onion side dish for dinner.  I would sometimes open up the oven and sneak a morsel of veggies just because I couldn't wait.  For those dinners, my plate would be half covered in buttery roasted vegetables, ensuring that on those days I satisfied my food-pyramid requirement.  When I studied abroad in Scotland, I had my mom send me a bottle of Lawry's seasoning salt so I could make this dish for my flatmates and enjoy a little bit of home.  It's so simple and so delicious, you should add it into your repertoire immediately. 


Hobo Roasted Vegetables
serves 2-3 as a side dish
from my mother's kitchen!

Ingredients
3 carrots, chopped into rounds
2 medium-sized baking potatoes, cut into 1-inch cubes
1/4 yellow onion, diced into medium-sized pieces
2 tablespoons butter
1-2 teaspoons of Lawry's seasoning salt

Directions
Preheat your oven to 350 degrees.  Line a baking sheet with foil to cut down on clean up.  It's buttery!

Put your chopped vegetables on the pan in an even layer.  Break apart the butter with your fingers, and dot the top of the veggies with small pieces of butter.  Sprinkle seasoning salt on top.  Shake the pan to coat the veggies with the salt.  Cover the pan with foil.

Bake for about 30 minutes covered, shaking the pan every so often to mix up the veggies.  Then remove the foil and bake for another 10 minutes, until the veggies start to brown up.  Remove from the oven and stir around to make sure all the vegetables are coated in buttery, salty goodness. 

Serve and enjoy!

** Food tip: I have a feeling that this side dish would also be astounding with some fennel added to it.  The co-op didn't have a fennel bulb when I went shopping, so I can't say for certain how it would mesh.  If you try it out with fennel or another hearty vegetable, let me know how it goes!**

Also, check out the facebook page for my blog and "like" it if you like good food :)

Monday, November 7, 2011

Roasted Brussel Sprouts with Maple & Butter

Let's face it: brussels sprouts have a bad rep.  I understand the reluctance of a child to try these veggies...as a child I would barely eat anything, let alone a brussel sprout.  But I have a hard time understanding the aversion of adults, especially those who have never actually tried a brussel sprout, but are hanging on to those childhood fears of new and strange looking vegetables.  C'mon people...if you're old enough to appreciate a good glass of wine or bottle of beer with dinner, you should be able to TRY a decent recipe for brussel sprouts! 

I made this side dish last Thanksgiving for my entire family, and I made a smaller portion, figuring that nobody would really want to try it.  Wow was I wrong.  This brussel sprout dish was the hit of the party!  Family members who have always been wary of brussel sprouts tried and loved the rich flavors and textures.  There are many ways to amp up a traditional roasted veggie dish, and this is one way to impress people with the often-forgotten brussel sprouts.  Now get over yourself and just try it! 


Roasted Brussel Sprouts with Maple & Butter
from Vegetarian Times magazine
serves about 8

Ingredients
2 pounds of brussel sprouts, washed & trimmed
2 tablespoons of extra virgin olive oil
Salt & pepper to taste
2 tablespoons of maple syrup
1 tablespoon butter (optional)

Directions
Preheat the oven to 400 degrees. 

In a large bowl, toss the brussel sprouts with the olive oil and some salt and pepper (I do about a teaspoon each).  Line a sheet pan with foil and pour the sprouts onto the pan in an even layer.  Bake for about 40 minutes until golden brown, shaking the pan every so often to toss the sprouts.

Once finished baking, place the brussel sprouts into a bowl and toss with the maple syrup and butter.  Taste and season as necessary.  Serve and be ready for compliments!

Friday, November 4, 2011

Crock Pot Enchiladas

For someone who loves to cook as much as I do, I can be surprisingly lazy in the kitchen.  I like to cut down on steps, cut down on utensils, and cut down on time as much as possible because at the end of the day, I wants to eat the food!  Some recipes require time and love in order to turn out right (like my completely from-scratch pumpkin pie, made with a real pumpkin), and I'll take those steps so long as I can balance out my cooking life with a few super simple recipes.  Like these crock pot enchiladas!

Who knew that you could make some pretty tasty enchiladas in a crock pot?  I certainly didn't.  And while they aren't your traditional enchiladas with the delicious and creamy sauce, these faux-enchiladas certainly hit the spot!  The mixture inside is spicy and the tortillas soak up a lot of the salsa juice and become really soft and chewy.  But the outside edges of the enchiladas get super crispy, so you end up with a great balance of textures.  If you're looking for a super simple and quick dinner that doesn't skimp on good flavor, look no further!


Crock Pot Enchiladas
adapted from thekitchn.com
makes about 8 enchiladas

Ingredients
2 jars of your favorite salsa (I like using a combo of hot and mild salsa from Salsa Lisa)
1 package of traditional tortillas, at least 8
1 1/2 cups of your favorite shredded cheese
1 15-oz can black beans, drained
1 cup frozen corn
3 scallions, chopped fine
2 teaspoons chili powder
1 teaspoon cumin
Salt & pepper to taste

Directions
Set up your crock pot and pour in about a cup of salsa, spreading it around to make an even layer.  In a medium bowl, combine the beans, corn, scallions, spices, and half of the shredded cheese.  Put about a third of a cup of the mixture into a tortilla and roll it up tight.  Place the tortilla seam side down into the salsa-coated crock pot. 

Repeat until you have about three or four squeezed into the crock pot in a single layer.  Pour another cup of salsa over those enchiladas and top with 1/2 cup of cheese.  Then repeat the enchilada-making process to create another layer in the crock pot.  When you get to the last layer, top with salsa but not with cheese.  Heat the crock pot on high for 2-4 hours.

When the enchiladas are done cooking, serve with a sprinkling of cheese, a dollop of sour cream, and some chopped cilantro. 


Tuesday, November 1, 2011

Pan de Muerto

I haven't posted in over a week (my apologies!) but I'm thrilled to be back with one of my favorite sweet breads of the season -- pan de muerto.  This requires a little bit of a back story.  From junior high through college I regularly took Spanish classes.  Come November, my Spanish teachers would always take a day out of lecture to have a party celebrating Dia de los Muertos, and it became my favorite event of the fall semester.  We would listen to music, decorate masks, and eat the oh-so-delicious pan de muerto to celebrate this day.

Dia de los Muertos, or Day of the Dead, is a holiday celebrated in Mexico and around the world that honors loved ones that have passed away.  People create memorials to honor the dead and spend the day remembering with gatherings and offerings to encourage the departed souls to come back to Earth.  People celebrate with brightly decorated skulls (in obvious contrast to our Halloween celebrations), marigold flowers, and food. 

source
Overall, it's a wonderful holiday that celebrates life and honors the dead.  One of my favorite parts about Dia de los Muertos is pan de muerto.  This delicious sweet bread is traditionally served during Dia de los Muertos and can be either shaped into a bun or into a skull with colorful sugar decorating the top.  I couldn't get enough pan de muerto during the high school celebrations, and the same is true today!  Not only is this bread completely delicious, but baking it reminds me to honor my friends and family that are no longer with me.  Consider celebrating this great holiday by baking some of your own pan de muerto!

Pan de Muerto
makes one giant loaf of bread
source
Ingredients
5-6 cups all-purpose flour
1/2 cup granulated sugar
2 packets dry yeast
1 tsp salt
1 tablespoon anise seed
1/2 cup milk
1/2 cup water
1/2 cup butter
4 eggs

1/2 cup sugar
1/3 cup fresh orange juice
zest from one orange

Directions
In a large bowl, combine 1 1/2 cups of flour, yeast, salt, anise seed, and sugar.  Mix to combine. 

In a small pan, heat the milk, water, and butter until nearly boiling.  Stir the warm liquid and the dry ingredients together until blended.  Mix in the eggs and add remaining flour gradually as needed until the dough is soft and not tacky.  I ended up using about 5 cups of flour total.  Knead the dough on a floured surface for ten minutes.  Place dough in a lightly greased bowl in a warm environment.  Cover.  Allow to rise until doubled in size, about 1 1/2 hours. 

Remove the dough from the bowl and shape into a large round.  Add additional molds to the top if desired.  (My "bones" didn't work out well!)  Let the bread rise for another hour.

Preheat the oven to 350 degrees.  Line a baking sheet with parchment paper and place the dough on top.  Bake for 40 minutes, until golden brown.

In a pan, mix the 1/2 cup of sugar, orange juice, and orange zest.  Heat over medium-high heat and allow to boil for two minutes.  This will make a glaze for the top of the bread.

When the bread is still warm, top with powdered sugar and then brush on the glaze.  Sprinkle colored sugar sprinkles on top in a design if desired.

Eat, enjoy, and happy Dia de los Muertos!