Showing posts with label dessert. Show all posts

Friday, March 16, 2012

Dulce de Leche Brownies

If you hadn't already noticed by the content of this blog, I'm not a huge sweets eater.  I very rarely have anything sweet or chocolaty in my kitchen (the holidays and girl-scout-cookie season are the main exceptions to this rule), and it never really bothers me.  Any cravings for sweet foods can usually be handled with a bowl of cereal or a spoonful of soy ice cream that I keep in the freezer.  Told you -- not a big sweet tooth!  But on those occasions that I'm really in the mood for something sinful, I figure I can just bake it myself.  Chocolate chip cookies can be thrown together in a hot minute, as can a super easy shortbread recipe that I use from Big Girls Small Kitchen.  But I read a blog post about easy dulce de leche and was intrigued enough to want to test it out.  I didn't want to have random cans of this sweet treat without putting them to good use, so a quick search for "dulce de leche brownies" and I had sealed my fate.  My kitchen would once again be home to some decadent, chocolate treats. 

After some internet research on the best and easiest way to cook dulce de leche from a can of condensed milk, I settled on the slow cooker version.  Stove top cooking had a few references to "explosions" and I didn't want to deal with that.  Slow cooking seemed to be the way to go for no fuss and minimal risk.  Turned out AMAZING.  Sweet, caramely, rich dulce de leche with very little effort.  The brownies were similarly easy to put together.  And they were dense, but didn't turn out overly rich, which allowed the sweetness of the dulce de leche to really shine through.  I'll admit: it was nice to have a dessert option for the last couple of nights!  I still have another can of dulce de leche that needs to be used.  More sweets might be in my future.
No-Fuss Dulce de Leche

Ingredients
1 can of sweetened condensed milk (or as many as will fit in your slow cooker)
Water

Directions
Remove the paper wrapping from the can of sweetened condensed milk.  Check the can to make sure it has no punctures or dents.  And do not open it!  Lay the can in the bottom of a slow cooker on its side.  Cover the can with about 1 inch of water. 
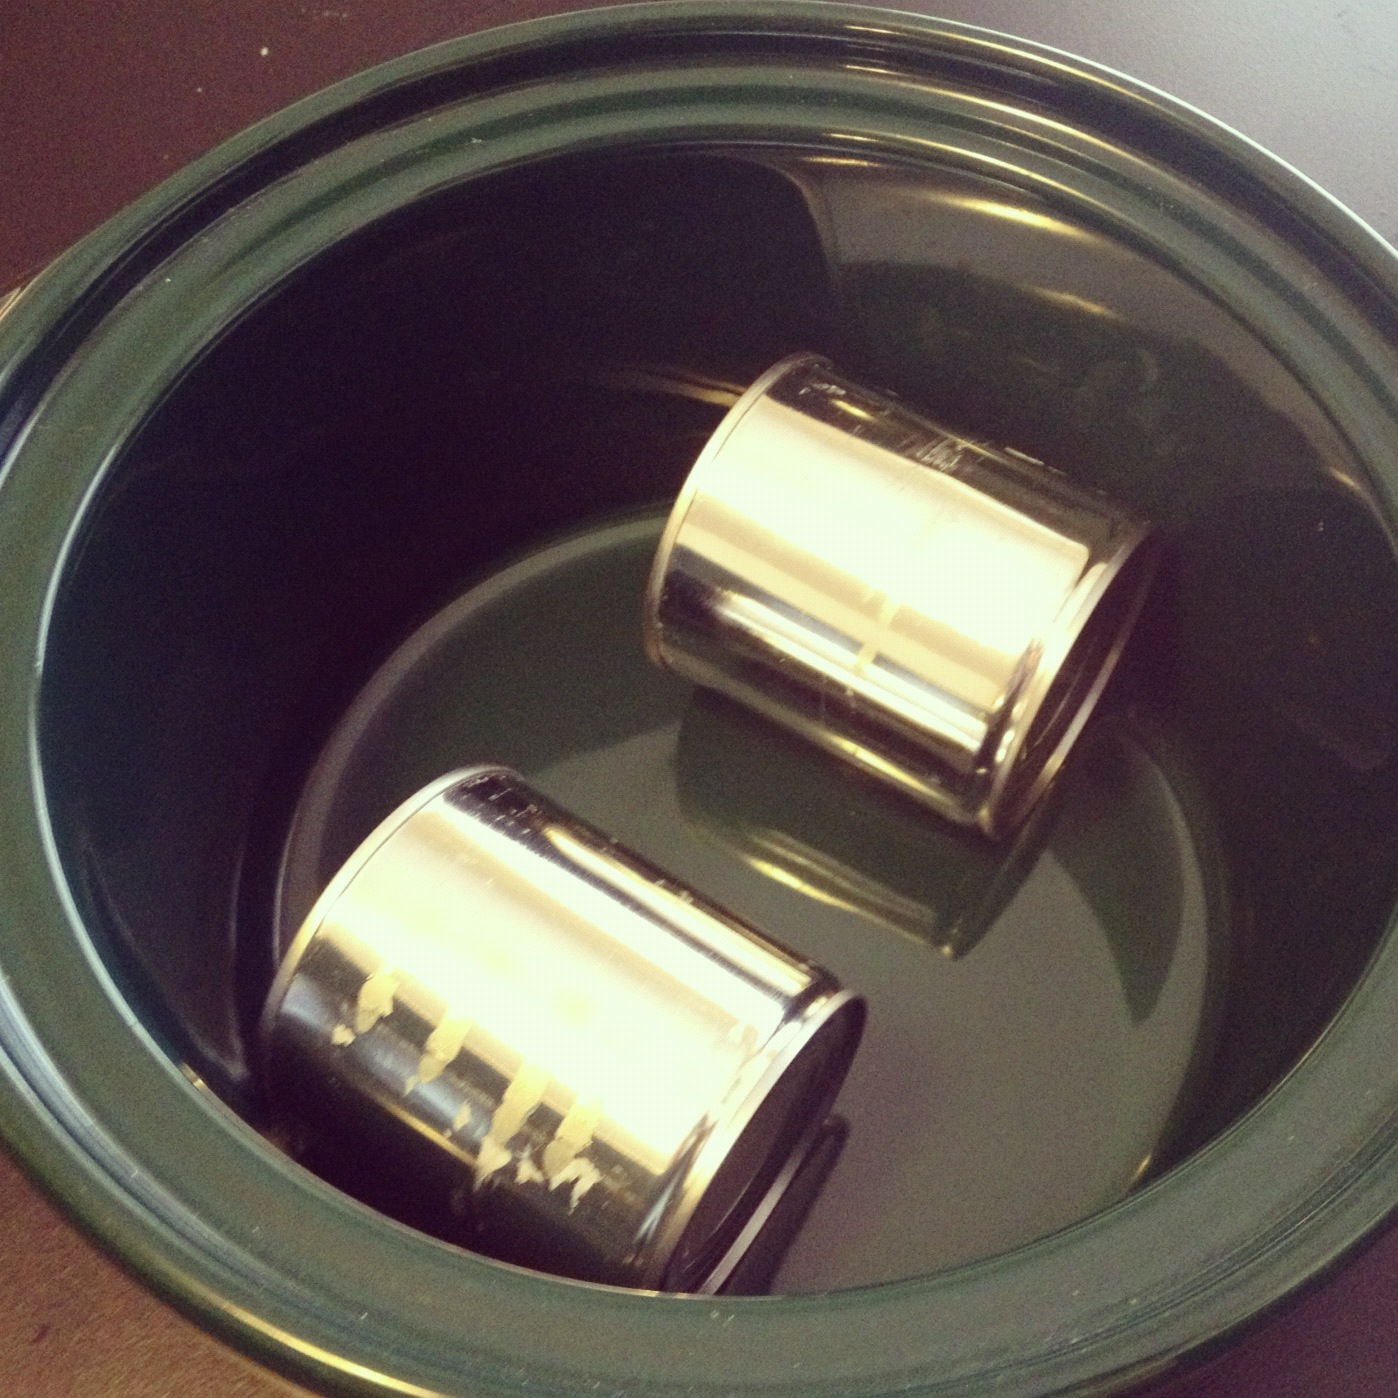

Heat the slow cooker to low and "cook" the can for about 8 hours.  Check every so often to be sure that the can is still covered with water.  Don't leave unattended in case it starts leaking. 

Once the 8 hours are up, remove the can from the slow cooker and allow to come to room temperature.  Once cooled, place your dulce de leche in the fridge (you can keep it in the unopened can) until you are ready to use it....preferably to make these smashing brownies..... 

Dulce de Leche Brownies
adapted only slightly from David Lebowitz

Ingredients
1 stick of unsalted butter, cut into pieces
8 ounces of semi-sweet chocolate, chopped
1/4 cup of unsweetened cocoa powder
1 cup sugar
3 large eggs
1 teaspoon vanilla extract
1 cup all-purpose flour
1 can of your dulce de leche (above)

Directions
Preheat your oven to 350 degrees.  In a small sauce pan over medium heat, melt the butter.  Reduce heat to low and add the semi-sweet chocolate, stirring continuously until melted and smooth.  Add the cocoa powder and whisk until it has combined.  Pour the chocolate mixture into a mixing bowl.

Add the eggs, one at a time, to the chocolate mixture, fully incorporating the egg into the chocolate before adding the next egg.  Then add your sugar, vanilla extract, and flour.  Mix to combine.

Prepare a 9x9 inch baking dish with aluminium foil on the bottom and sides of the baking dish.  (The brownies are really sticky, so this step helped a lot for serving and clean up!).  Spray the foil with baking spray.

Scrape half of the brownie mixture into the pan and spread evenly.  Then add large spoonfuls of your dulce de leche to the top of the brownie mixture.  Use about half of the can.  Using a knife, swirl the dulce de leche to even it out.  Scrape the next half of the brownie mixture on top and spread it evenly.  Drizzle the remaining dulce de leche over the brownies and use your knife again to create swirly patterns. 


Bake for about 35-40 minutes, or until the brownies in the middle of the pan have just set.  Test with a cake tester or fork if you want to ensure that they are done.  Eat a brownie warm out of the oven.  Take extras to your friends to impress them with your culinary wizardry.

Monday, December 12, 2011

The Great Food Blogger Cookie Exchange!

This year I participated in the Great Food Blogger Cookie Swap!  The premise seemed simple enough -- it was basically an extended, cross-country version of your traditional cookie exchange.  Oh how I loved it when my mom participated in cookie exchanges during the holidays.  We'd come home one day and there would be plates and plates filled with exotic-looking cookies for us to eat.  To this day, every Christmas I tell my mom to make these elusive cookies that I swear we had during a cookie exchange.  There was chocolate, maybe some peanut butter, and chow mein noodles.  I hope to someday find the recipe for this mysterious cookie.

But back to the present-day cookie swap!  Two food bloggers organized an extraordinary cookie exchange between 625 food bloggers in the U.S. and even, I think, in other countries.  We had to commit to making and sending one dozen cookies to three different food bloggers.  Then all of the recipes would be posted simultaneously today!  But choosing the right recipe would be a challenge.  Many of my favorite holiday cookies need to stay chilled and were inappropriate for this cross-country exchange.  So my mom and I went through her traditional holiday cookies and we settled on one of my top 5 cookies for the holidays: the bon bon cookie.  It's an adaptation from an old Betty Crocker recipe, and my 1989 version of that cookbook had already eliminated it from the recipe selection.  I decided to keep the recipe alive, so I baked my cookies and shipped them off to Los Angeles, Colorado, and Florida care of:

Nick @ Macheesmo
Nicole @ Sweet Peony
Leann @ Taste & Travel

I've been out of town for the last five days, so I'm excited to get my three dozen cookies from around the country once I finally get my mail.  Just what I need after a Florida vacay -- cookies :)  So for those of you looking for an easy holiday cookie recipe, or for those of you who received my cookies and want to know the secret behind the magic, here you go!  And I really really hope they turned out well for you!  Check back later for an update on the cookies I received from the swap!


Happy Holidays!

Bon Bon Cookies
adapted from Betty Crocker
makes about 24 cookies

Ingredients
for the cookies:
1/2 cup softened butter
3/4 cup sifted powdered sugar
1 tablespoon of vanilla (yes, tablespoon!)
1 1/2 cups flour
1/8 tsp salt
1-2 tbls cream

for the glaze
1 cup powdered sugar
2 tbls cream
1 tsp vanilla
colored sprinkles

Directions
Preheat your oven to 350 degrees.

In a large bowl, use an electric mixer and mix the butter, vanilla, and sugar.  Add the flour and salt and mix again.  At this point, my mother always adds a little dash of cream.  If your dough is dry, you can add even more, up to two tablespoons.

Drop tablespoon-sized balls of dough onto an ungreased baking sheet about 1 inch apart.  Bake for 12-15 minutes or until the edges are just turning light brown.  Let the cookies cool on a cooling rack.

In the meantime, mix up the ingredients for the glaze (except the sprinkles).  Once the cookies have cooled, dip the tops of them into the glaze and let them sit on a pan covered in parchment paper.  Sprinkle the cookies with the colored sprinkles.  Refrigerate the cookies for about an hour so the glaze will set.  Eat and enjoy!

Thursday, October 20, 2011

Pumpkin Spice Cookie Sandwiches

This last Sunday I co-hosted a baby shower for my friend Tara, the first of my high school friends to get pregnant!  After much discussion, us three co-hostesses decided to forgo the traditional baby-themed showers and go with a fall theme instead.  The fall colors fit perfectly with Tara's nursery scheme and we had the shower on a beautiful fall day, complete with farmers' market flowers and candles.  So elegant.

For the menu, we opted for a dessert buffet in the afternoon.  And just to balance out the food, we had an awesome cheese plate and some pre-made palmiers from Trader Joe's as our savory options.  The spread was insane! 

We had cupcakes, a carrot cake, individual pudding cups topped with a mint sprig, and espresso bars.  And my contribution to the party included chocolate peanut butter balls, this time with a teaspoon of cinnamon and nutmeg added into the peanut butter mixture, and pumpkin spiced pies.  I found this recipe on a Better Homes & Gardens website that my mom sent me with 100 recipes for pumpkin.  Ummm, delish.  These little whoopie pies were perfectly sweet but not too intense and had a delightful spice that was perfect for fall.  I doubled the recipe to make enough for the baby shower, and you can shape the cookies as large or small as you want to suit your needs. 


Pumpkin Spice Cookie Sandwiches
From Better Homes & Gardens
makes about 16 medium-sized pies

Ingredients
For Cookies:
1 can cooked pumpkin
1 box spiced cake mix (love those shortcuts)
1/3 cup softened butter
2 eggs
1/2 cup milk

For spiced filling:
8 oz cream cheese, softened
1 1/2 cups powdered sugar
3.5 oz marshmallow fluff
1/3 cup softened butter
1 tsp vanilla extract
1/2 tsp ground cinnamon
1/2 tsp ground nutmeg

Directions
Preheat oven to 375 degrees.

Line a cookie sheet with parchment paper.  In a large mixing bowl, beat pumpkin and butter with an electric mixer on medium speed until smooth. Add cake mix, eggs, and milk; beat on low speed until combined, and then on medium speed for 1 minute.

Drop mounds of batter 3 inches apart on cookie sheet; keep remaining batter chilled. Bake 15 minutes or until set and lightly browned around edges. Carefully remove from parchment or foil; cool on wire rack. Repeat with remaining batter, lining cooled cookie sheets each time with new parchment or foil. If desired, place cookies in a covered storage container with waxed paper between layers to prevent sticking.  Keep cookies in the refrigerator  until ready to serve.  (They get tacky if you keep them at room temp as per the original recipe -- they were easier to handle and eat if chilled.)

Up to 2 hours before serving, beat together all ingredients for marshmallow filling.  Put the filling into a large ziplock bag.  Clip the corner of the bag, and squeeze out a layer of marshmallow cream on one cookie.  Top with a second cookie to make a sandwich.  Repeat until finished making cookie sandwiches.  Serve immediately or cover and chill up to 2 hours.

Monday, October 17, 2011

New Orleans Party: Beignets

This weekend I was ridiculously busy.  I co-hosted two parties, and then decided to go to a 10pm concert Sunday night to wrap up my weekend.  Needless to say, Monday is really challenging me!  But back to the fun times!  My dear friend is getting married in December (in Key West!) and I co-hosted her bachelorette party on Saturday night.  She got engaged last fall in New Orleans, so my foodie friend and fellow co-host Sarah decided we should throw a themed party, complete with New Orleans inspired appetizers, drinks, and decorations.  Sarah cooked up some Cajun crab cakes, the bride-to-be's sister brought an amazing black-eyed pea salsa, and the maid of honor wowed everyone with a shrimp and andouille sausage appetizer.  In addition to my party game (Guess Those Abs!), I contributed some homemade beignets as the sweet option to our appetizer table.

I'd never heard of beignets, but when I saw the recipe, I knew it would be a winner.  What's not to love about pieces of fried dough covered in powdered sugar?  Nothing.  The answer is absolutely nothing.  The dough was very easy to make and after rising, I had enough dough for maybe four hundred million beignets.  I made about a third of the dough into beignets and was able to get maybe 3-4 dozen little pieces of happiness out of that chunk.  When dropped into the oil, the dough puffs up, turning into a fluffy little square of sweetness.  They were insanely good warm, delicious at room temp, and were still holding up well the next morning as a makeshift breakfast!


Beignets
adapted from Paula Deen's recipe
makes about 9 dozen beignets

Ingredients
1 1/2 cups lukewarm water
1/2 cup sugar
1 envelope active dry yeast
2 eggs, slightly beaten
1 1/4 tsp salt
1 cup evaporated milk
7 cups bread flour
1/4 cup unsalted butter, softened
Nonstick spray
Medium-size bottle of vegetable oil
3 cups of powdered sugar

Directions
Mix water, sugar, and yeast in a large bowl and let sit for 10 minutes.

In another bowl, beat the eggs, salt and evaporated milk together. Mix egg mixture to the yeast mixture.  Add 3 cups of the flour to the yeast mixture and stir to combine.

Add the butter and continue to stir while adding the remaining flour. Remove dough from the bowl, place onto a lightly floured surface and knead until smooth. Spray a large bowl with nonstick spray. Put dough into the bowl and cover with plastic wrap or a towel. Let rise in a warm place for at least 2 hours.

Preheat oil in a large pan to 350 degrees.  The oil need not be more than about 2 inches up the side of the pan.  Add the powdered sugar to a ziplock bag and set aside. 

Roll the dough out to about 1/4-inch thickness and cut into 1-inch squares.   (I rolled out the dough in chunks to make it easier.)  Place a handful of the dough pieces into the hot oil and deep fry, flipping constantly, until they become golden brown.  After beignets are fried, drain them  on paper towels, and then toss them into the bag of powdered sugar.

Continue until all pieces are cooked.  Serve warm and enjoy.

Sunday, August 7, 2011

Chocolate Peanut Butter Balls

My good friend Lauren from college is moving this summer to start graduate school in Boston.  So obviously, we couldn't let her go without throwing a little shindig in her honor!  I wanted to bring a yummy snack for the party, and I first made a spinach dip from the Joy of Cooking cookbook.  After a ton of reworking, I decided that the recipe was a total disaster.  Ugh.  Don't make it!!

Lauren loves chocolate and peanut butter, so my next attempt was Chocolate Peanut Butter Balls from this awesome cookbook that, coincidentally, I bought in Boston!  It's called Clean Start by Terry Walters, and it's awesome.  Kind of like these tasty morsels.  Wow were these insanely easy to make and insanely easy to eat!!  I looooved them, and so did my friends!  (They also said they liked the dip, but I think they were just being nice because that dip tasted like pure evil.)  If you're looking for a Reeses-type snack that's a bit healthier, look no further!

Ingredients
1 cup natural peanut butter
1/2 cup maple syrup
1/2 cup crispy rice cereal
12 oz chocolate chips or chocolate squares (semisweet or dark chocolate)

Directions
In a food processor, combine the peanut butter and maple syrup.  Once combined, gently stir in the rice cereal.  Form the mixture into penny-sized balls and put on a baking sheet lined with parchment paper.  If the mixture isn't sticking together, add some more rice cereal. 

In a small saucepan, melt the chocolate over low heat.  Once melted, turn off the heat.  Put the peanut butter balls three at a time into the melted chocolate.  Turn lightly with a small spoon to coat with chocolate.  Remove with the spoon and place back onto the parchment. 


Once finished, put the pan into the refrigerator to cool for about an hour.  YUM.

Tuesday, July 12, 2011

Zucchini Chocolate Chip Cookies

I'm always trying to find ways to put vegetables into desserts.  Mostly because carrot cake is SUCH a success....the veggie/dessert combo cannot be limited to just that!  So while I was re-reading Animal Vegetable Miracle (read it!) to get some recipe ideas for June/July produce, I zeroed in on the "Zucchini Chocolate Chip Cookie" recipe.  I held off on this recipe until I made it to the St. Paul Farmers' Market this weekend so I could buy fresh, homegrown zucchini.  If it's going into my dessert, it's gotta be top quality.  The cookies were soft, almost cake-like, and delish.  Turns out zucchini cookies makes a great finishing course!  This recipe will make about 2 dozen small/medium cookies.


Ingredients
1 egg, beaten
1/2 cup (1 stick) softened butter
1/2 cup brown sugar
1/3 cup honey
1 tbls vanilla extract
1 cup white flour
1 cup wheat flour
1/2 tsp baking soda
1/4 tsp salt
1/4 tsp cinnamon
1/4 tsp nutmet
1 cup shredded zucchini (this was about half of a large sized zucchini)
12 oz chocolate chips

Directions
Preheat oven to 350 degrees.

In a large bowl combine the beaten egg, butter, brown sugar, honey, and vanilla extract.  You can use a handheld mixer or just beat it together with a whisk for a few minutes.  (Good arm workout!)

In a smaller bowl, combine the flours, baking soda, salt, and spices.  Blend the dry ingredients into the wet ingreidents.  Stir in your zucchini and chocolate chips.  Mix well.


Drop spoonfuls of cookie dough onto a greased baking sheet, or a baking sheet lined with parchment paper.  Flatten the cookies with a spoon.  Bake for 10-15 minutes.  And you have to try just ONE fresh out of the oven....


Mmmm....melty chocolatey goodness.  Oh and it's totally healthy for you!!  Enjoy!

Saturday, May 14, 2011

White Chocolate Raspberry Cookies

Apparently in the Twin Cities there is a lawyers summer softball league.  Some of my coworkers create a team each year, and every year I have to remind them that I have absolutely no coordination and I'd only be a liability on their team.  But they have a bake sale at work to raise money for the entry fees, and I happily contribute some baked goods to help!  I can bake....I cannot play softball.  Seriously.

This year I made some white chocolate raspberry cookies from the Big Girls Small Kitchen blog that I've made before and just loved.  They are chewy, tart, and oh-so delicious.  Plus, it's pretty easy to make them!  I adapted the recipe only slightly because I like more raspberry than white chocolate in my cookies, but the original recipe is pretty flawless.  Side note: I've never made anything from BGSK that has NOT been delicious! 

Ingredients
2 cups frozen raspberries
1 tbls sugar

1/3 cup sugar
1/3 cup light brown sugar
1 stick butter
1 egg
1 1/4 cups flour
1/2 tsp baking soda
1/4 tsp salt
1 cup white chocolate chips

Directions
Preheat oven to 265 degrees.  Spread the raspberries on a parchment-lined baking sheet.  Bake for 35 minutes, then sprinkle the 1 tbls of sugar over the berries and cook for another 20 minutes. 

Increase oven temp to 350 degrees.

Beat the butter and sugars with an electric mixer for a minute or two until well combined.  Beat in the egg.  Separately, whisk the flour, baking soda, and sat, and add that to the wet ingredients.  Beat until the dough just comes together.  Add the white chocolate chips and stir.  Sprinkle the cooled raspberries on the dough and cut them into the dough with two butter knives. 


Form the dough into tablespoon sized balls and arrange on a baking sheet lined with parchment paper.  Bake for 10-12 minutes, until the cookies are set but not very browned.  Cool and enjoy!

Friday, May 6, 2011

Taste Thursday :: Desert Sand Cookies

The last two weeks I haven't found much in the Star Tribune's Taste section that inspired me.  The recipes were either too complicated, took too long, or involved a lot of bacon.  Yesterday though I decided to try out the Desert Sand Cookies from the back page of the section.  It seemed appropriate to get my Scandinavian heritage on for Cinco de Mayo.  Plus it was one of the only recipes in the section that seemed relatively quick and easy. 

I have to admit though, when I got the dough together I was really nervous!  It didn't seem so much like dough as it did, well, a big pile of sand.  (I should have guessed considering the name of the cookie....) But I was sure that I'd made a mistake and that these cookies would not form.  Not to be discouraged I made a test batch.  Those turned out pretty good, so I made the rest of them.  The cookies are actually pretty delicious!  The browned butter added a complex flavor to these cookies that otherwise would have been kind of like shortbread.  They crumble in your mouth much like a cookie made out of sand would, so they are very light and delicate.  Perfect with a cup of tea.  This recipe makes 3 dozen small cookies or 2 dozen medium cookies. 

Ingredients
2 sticks of unsalted butter
2 cups flour
1/2 tsp baking powder
1/2 tsp vanilla extract
1 cup sugar

Directions
Put the butter in a sauce pan and melt over medium heat, stirring occasionally.  Once the butter starts to foam, begin to stir constantly.  The butter will start to brown up pretty quickly so don't go anywhere.  Once the butter is a deep brown color, remove from heat and let cool to room temperature for about an hour.

Preheat your oven to 350 degrees.  In a medium bowl, combing the flour and baking powder.  In a separate bowl, combine the sugar, vanilla extract, and the cooled butter.  Add the flour mixture to the wet ingredients and stir with a wooden spoon until a dough forms.  (Again, it's going to be more like sand than a dough.) 

The recipe says to use teaspoons but I work better with my hands.  So I grabbed about a tablespoon size of the dough and kind of squished it together to form a oval-shaped mound.  Smooth the dough gently so that it doesn't have your palm prints on it!  Bake the cookies for 10-15 minutes.  They do not brown much, so do not be worried about that.  Remove from the pan and let cool on a wire rack.  They are very delicate out of the oven and until they are cooled so be careful. 

After they've cooled, have a taste!  Isn't it like eating a sand cookie (but way better)?  Yum.

Monday, April 11, 2011

Fruit Crisp

I'm not a big dessert lover.  Don't get me wrong -- I do enjoy desserts.  But I'm more of a main-course kind of girl.  Still, I hadn't baked anything in a while and I wanted to mix up my kitchen routine.  I was debating between a chocolate pudding tart and a strawberry rhubarb crisp, both from Barefoot Contessa's new (and awesome) cookbook, "How Easy is That?"  I posted up the inquiry on Facebook and the tart was the winner! 

Rhubarb isn't readily available right now, so I figured out a different fruit combination.  THEN I had a fruit disaster at Whole Foods!  They didn't have fresh peaches and when I got home, I saw that half of my raspberries and half of my strawberries were moldy or rotten.  DISLIKE.  So I had to pull some of my frozen fruits out of the freezer, and it still ended up working out great!  I've made a strawberry rhubarb crisp in the past and it's a fantastic combination.  Because these fruits are a little sweeter, and because they were frozen, the recipe had to be adapted a little bit.  But it's a warm, yummy dessert that is satisfying without feeling sinful. 

Ingredients
8 cups fruit total (I used a mixture of strawberries, raspberries, and frozen peaches, all in about equal portions)
1 cup sugar, divided
1 1/2 tsp orange zest
1 tsp lemon zest (optional if using combo of very sweet fruits like I did)
1 tbls cornstarch (if you are using frozen fruit, use a bit more cornstarch, perhaps another 1/2 tbls)
1/2 cup freshly squeezed orange juice (or the juice from the orange and the lemon you zested)
1 cup all purpose flour
1/2 cup light brown sugar
1/2 tsp salt
1 cup quick-cooking oats
1 1/2 sticks cold, unsalted butter, diced

Instructions
Preheat your oven to 350 degrees.

Toss your fruit with 1/2 cup of the sugar and the zests in a large bowl.  In a measuring cup, dissolve the cornstarch in the fruit juices, then mix it into the fruit.


Pour the mixture into a 8x11-inch baking dish and place on a sheet pan lined with parchment paper.


To make the crumbly topping, combine the flour, remaining sugar (1/2 cup), brown sugar, salt, and oatmeal together with a spoon or your hands.  Add the diced butter into the bowl and use your fingers to incorporate it into the dry ingredients.  As a point of reference, it's kind of like you're pinching the chunks of butter or smearing the butter into the flour mixture.  You can use a fancy mixer too, if you like.  It should end up being a moist and crumbly topping.


Sprinkle the topping over the fruit, making sure to cover the entire fruit surface with the crumbly topping.


Bake for one hour, or until the fruit is bubbling and the topping is golden.  Serve with ice cream and a sprig of mint, or just eat it up for a Sunday lunch.......what, I don't do that....


***Now which do you prefer -- a chocolate-based dessert, or a fruit-based dessert??***